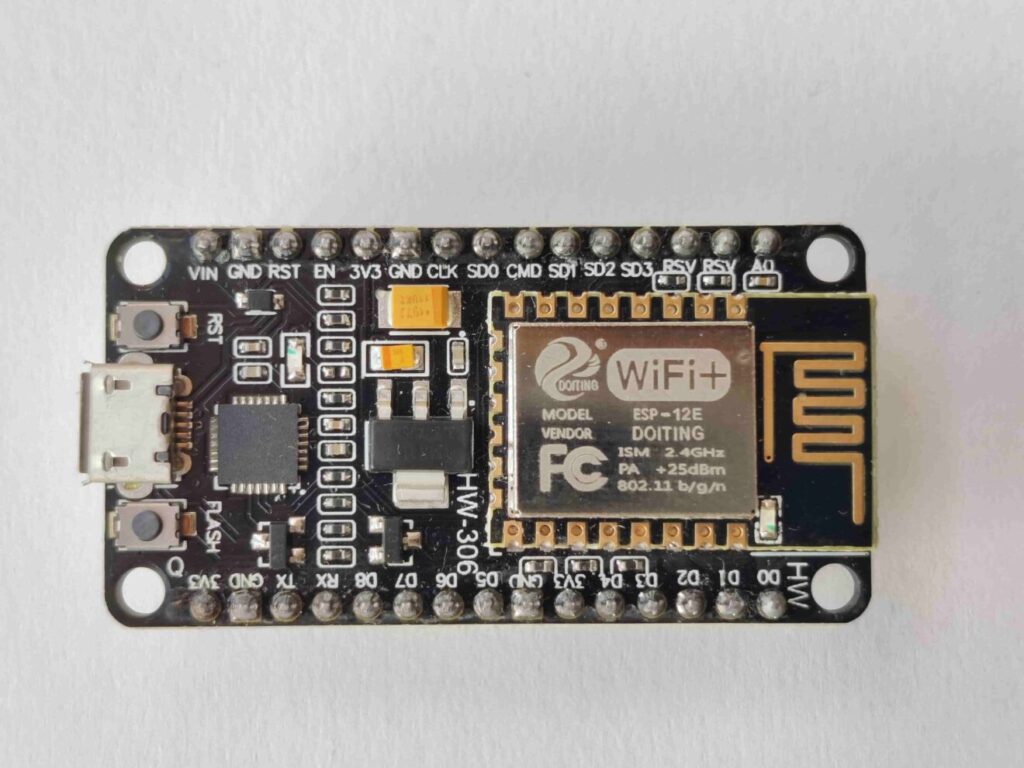
Welcome to PowerGenious Projects! In this DIY project guide, we will learn how to create a system of Home Automation using ESP8266 NodeMCU Arduino, bringing smart functionality to your fingertips. This project not only illuminates the possibilities of modern technology but also provides an accessible entry point for enthusiasts keen on transforming their homes into intelligent, automated havens. This project can also be used as a school or college project idea.
Project Overview
This DIY Home Automation project leverages the ESP8266 microcontroller, known for its Wi-Fi capabilities, to enable seamless communication between various smart devices. With the Arduino IDE as our programming platform, we will create a system that allows users to control lights, appliances, and other home devices remotely.

Material Required
- ESP8266 NodeMCU
- Relay modules (for controlling appliances)
- LED lights
- Breadboard and jumper wires
- Smartphone or computer with Blynk app
- Power source (USB cable and adapter)
Project Steps
Step 1: Setting up the Arduino IDE for ESP8266
- Download and install the Arduino IDE from the official Arduino website.
- Open Arduino IDE, go to File > Preferences, and in the “Additional Boards Manager URLs” field, add the following URL: http://arduino.esp8266.com/stable/package_esp8266com_index.json
- Go to Tools > Board > Boards Manager, search for “esp8266,” and install the ESP8266 board package.
- Select the NodeMCU board from Tools > Board > NodeMCU 1.0 (ESP-12E Module).
Step 2: Connecting the ESP8266 and Relay Modules
- Connect the VCC of the relay module to the 3.3V output on the NodeMCU.
- Connect the GND of the relay module to the GND on the NodeMCU.
- Connect the IN1 pin of the relay module to a GPIO pin on the NodeMCU (e.g., D1).
- Connect the positive (anode) leg of the LED to the Common (COM) terminal of the relay.
- Connect the negative (cathode) leg of the LED to the GND on the NodeMCU.
- Repeat these connections for each relay module and corresponding device.
Step 3: Programming the ESP8266
- Write the following Arduino sketch to define device control logic and integrate the Blynk library for creating a user-friendly mobile app interface.
#include <BlynkSimpleEsp8266.h>

// You should get Auth Token in the Blynk App.
// Go to the Project Settings (nut icon).
// Paste your Auto Token below.
char auth[] = "YourAuthToken";

// Enter Your WiFi credentials below.
char ssid[] = "YourSSID";
char pass[] = "YourPassword";

// Virtual Pin for Blynk app interface
#define VIRTUAL_PIN V1

// Pin to control the relay module
#define RELAY_PIN D1

void setup() {
  // Debug console
  Serial.begin(115200);

  Blynk.begin(auth, ssid, pass);
}

void loop() {
  Blynk.run();
}

// Blynk app button press event
BLYNK_WRITE(VIRTUAL_PIN) {
  int value = param.asInt(); // Get the state of the button

  if (value == 1) {
    digitalWrite(RELAY_PIN, HIGH); // Turn on the relay
  } else {
    digitalWrite(RELAY_PIN, LOW); // Turn off the relay
  }
}
Step 4: Creating a Blynk App Interface
- Download and install the Blynk app on your smartphone.
- Create a new project in the Blynk app.
- Assign a button widget to the virtual pin (V1) for device control.
Step 5: Testing the Home Automation System
- Connect the NodeMCU to your computer via USB and upload the code.
- Open the Serial Monitor to view the ESP8266’s connection status.
- Open the Blynk app and press the button to test device control.
Step 6: Expanding the System (Optional)
- Add more relay modules and devices by duplicating the connections for each device.
- Explore additional features of the Blynk app, such as sensor integration or automation rules.
Benefits and Application
Convenience and Control:
- Enjoy the convenience of controlling home devices remotely through a user-friendly mobile app interface.
Energy Efficiency:
- Optimize energy usage by remotely managing lighting and appliances, contributing to a more energy-efficient home.
Learning Experience:
- Gain valuable insights into IoT and home automation technologies, making this project an excellent educational tool for electronics enthusiasts.
Conclusion
Congratulations! You have successfully created a DIY Home Automation system using ESP8266 Arduino. This project serves as a foundation for expanding and customizing your smart home. Feel free to explore advanced features, integrate more devices, and enhance the automation experience.
Follow us for more interesting electrical projects like this. Happy Automating!


Hi there to all, the contents present att this web site are in fact amazing
for people knowledge, well, kewp up thee goopd work fellows.